The Creation of a Bow Handle

A contribution by Philipp Dasbach

The Problem

In archery, the repeatability of the entire shooting process is
crucial for a good result. I myself have owned an Olympic recurve bow with sights (aiming device) and stabilization system (weights for balancing, for smoother aiming) for several years.

Characteristic of this type of bow are the curved or backward bent ends of the bow, from where the English term “recurve” comes.
Unlike other shooting sports, where, for example, is shot over the rear sight and front sight, the sight of the recurve bow has only the front sight. Thus, the body posture and the stopping point of the bow (anchor point) form the second reference point of the recurve bow to define the direction in which the arrow flies. That is, even if the front sight always points to the gold (center of the target), but the bow is slightly different in your hand than it was when you shot it before, the arrow will hit somewhere else.

Therefore, many archers customize the grip of their bow with grip tape or modeling clay to craft a grip that is perfect and stable in their own hand. Since I was not satisfied with the grip of my bow, I decided to design my own grip, which also looks professional due to 3D printing.

The Recurve Bow

Attempts to apply known knowledge

Before I designed the grip according to my ideas, I first wanted to copy the original grip of my bow, so that I could make the adjustments that seemed reasonable from this basis.

Due to my mechanical engineering studies at the University of Siegen, I am familiar with the use of CAD software and have confidently approached the design. However, two things caused me an unexpected amount of problems.

First, it took me a long time to design the many interlocking fillets of the handle. These fillets are very difficult to reproduce with software solutions from the mechanical engineering sector, since they usually have defined geometries. This took me some time, but also forced me to learn new features and capabilities of CAD software.

The second issue that cost me a few tries in 3D printing is the measurability of the hard-to-define geometries.
Since the handle has only a very narrow, straight edge, it was very difficult to measure the position of the hole, bevels and radii. However, it is important for the attachment of the grip piece to the sheet that the geometry of the grip piece corresponds exactly to the geometry of the receptacle provided for it on the sheet. Since I could only roughly estimate many dimensions, I had to approach the correct geometry step by step through trial and error.

During this trial and error, I was able to learn a lot about 3D printing from the staff and makers in the Fab Lab. Above all, they helped me find the ideal slicer settings for my part and the right material. In addition, the Fab Lab works with different CAD programs, all of which have their strengths for different problems.

Prototyping

After four attempts I had copied the original grip of my bow sufficiently well and started with attempts to adapt the grip geometry to my hand. In the process, I tried a total of five different versions.

First, I made changes that seemed logical to myself to stabilize certain areas of the hand to prevent it from slipping back and forth. On the other hand, I combined this with geometries of grips from different manufacturers to arrive at my individual and optimal grip.

Currently, I have mounted a version of the grip on my bow, in which I have rounded some disturbing edges of the original grip and minimize the back-and-forth slipping by changing the angle of the contact surface.

Arch with mounted handle on bracket

Satisfied, but surely there’s more?!

I definitely achieved my goal of getting a better grip than the old one. Whether I have already found the ideal solution, I do not know, because there are still some geometries that I could try.

In the meantime, I uploaded the latest version of the grip to Thingiverse and hope to run into an archer who also uses my grip. Overall, I have to say that through the exchange in the Fab Lab I got ideas and tips that I would never have come up with on my own.
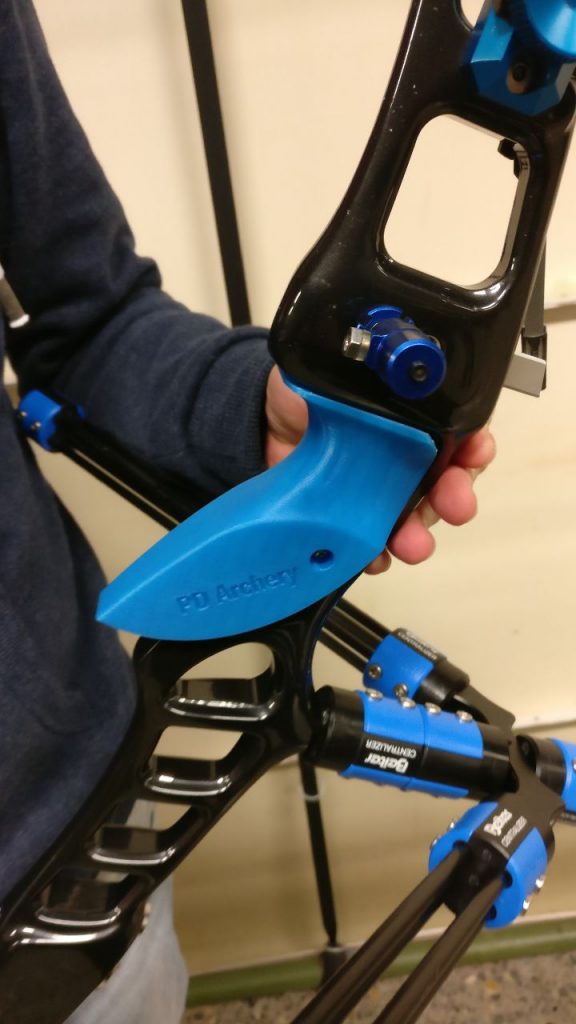
Handle piece, mounted on bow

Copyright Pictures: Philipp Dasbach

Creation of a Tabletop Game

A field report by Tim Dümpelmann

When I entered the Fab Lab for the first time in November, I was really amazed that there was such a great place here in Siegen. The people were very nice and open-minded and I felt comfortable right away. I guess it’s also because I’ve always been a bit of a technology nerd.

An Idea is Quickly Found

The 3D printers have aroused special interest in me. Not only because it was exciting to watch them work, but also because I am somewhat involved in 3D modeling as a hobby. Over the next few weeks, I was at Open Lab every Friday. There I met many nice, interesting people who were all working on great projects.

I think creativity is somewhat contagious. Therefore, it did not take long and I had also decided on my first project:
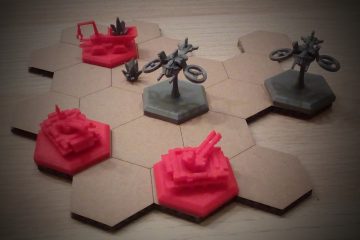
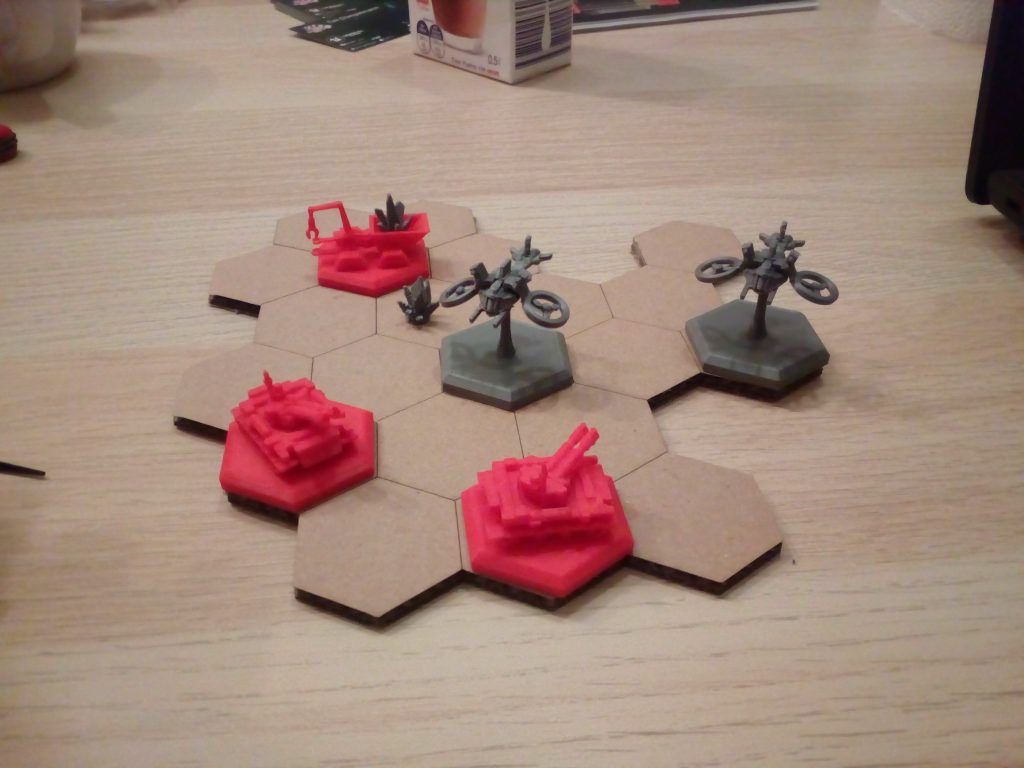
i wanted to create a tabletop game, model all the game pieces myself and make them with a 3d printer.
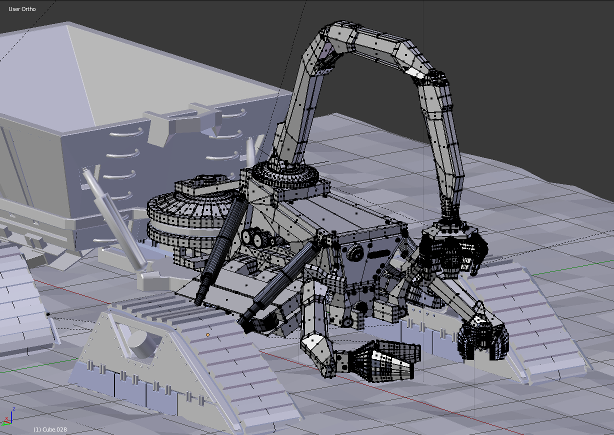
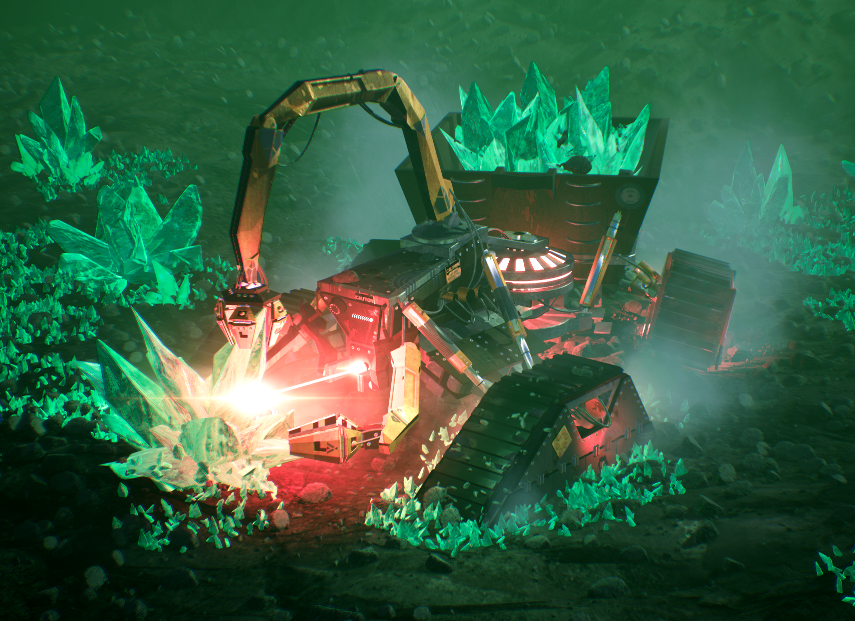
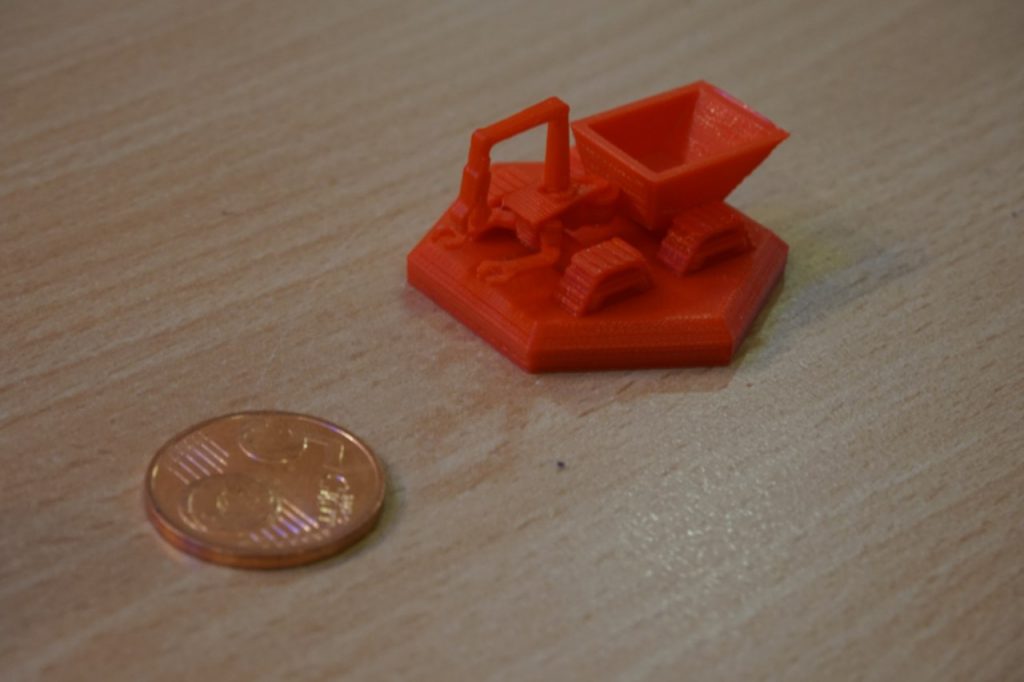
Since I had just rendered a great picture (see below) of a “MechMiner” for a science fiction contest, I took it directly as a template for my first figure, the “resource collector”.
mechminer-modell
minersmall

The Right Manufacturing Process

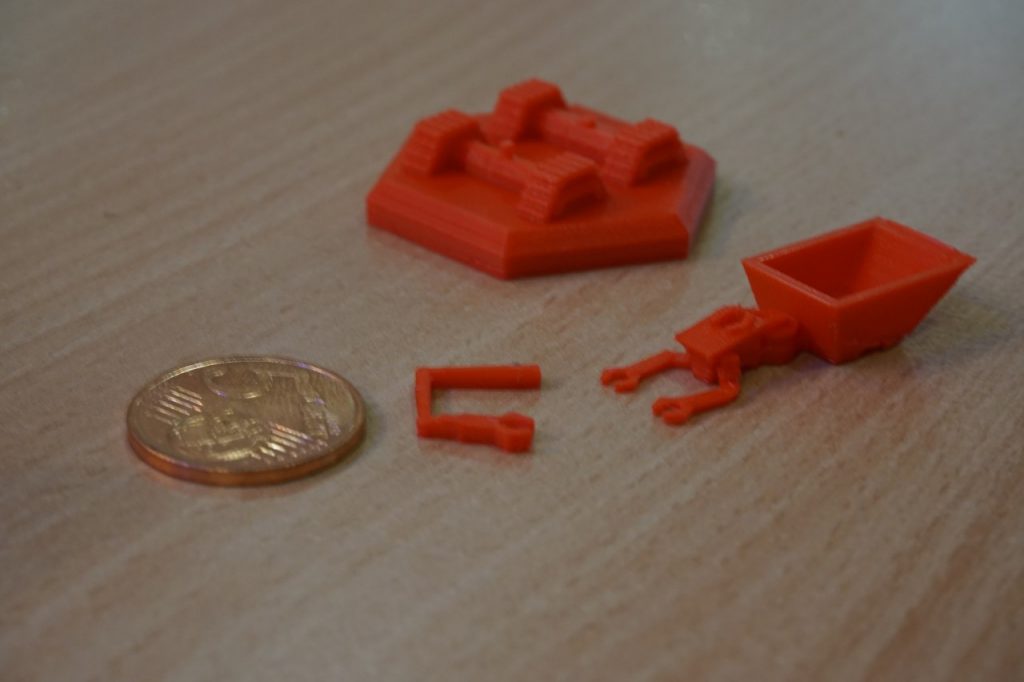
Then I just started modeling. In doing so, I often reached the limits of the FDM printing process due to the small dimensions of my figures and the many details in the 3D models. Therefore, I considered a modular plug-in system to be able to print as efficiently and detailed as possible. I was offered to use an SLA printer, which has much higher precision, but dealing with resins and other liquids is not really my thing.

IMG_20190329_223633_426
IMG_20190329_223626_578

Build, Build, Build

With most problems, both in modeling and in manufacturing, someone was always ready to help me. Since the laser was a little more complicated to use than the 3D printers, I was also quite happy about it.
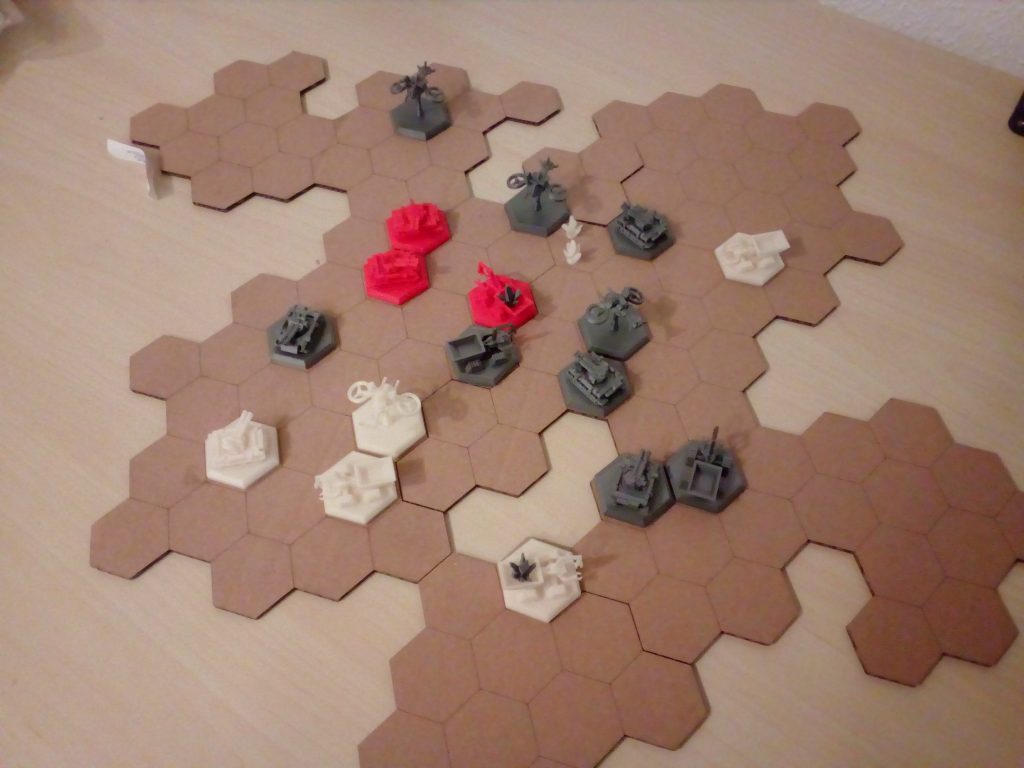
Since the laser was a little more complicated to use than the 3D printers, I was also quite happy about it. This one was perfect for making a nice modular game board. At the moment the game is not finished yet, so here you can see only a prototype for testing the game mechanics.

IMG_20190317_003814
IMG_20190329_223410

It will be some time before the first version can be played. Balancing will take a long time, and there are still many game cards to be designed.
I have already put the 3D models into a Github project. Stay tuned!

And Around It: The Lab

I myself could also help some people with their projects with my knowledge, and it makes me a bit proud :). I think coming together and working with like-minded people is what makes Fab Lab such a great place.
The technical competence of the staff is high and they do their work very professionally.
The Lab provides opportunities for everyone to try out technology. And I definitely found some people there that I would call friends.
In the meantime, I own my own 3D printer to move the project forward.
Thanks again to everyone who helped set up and troubleshoot!

IMG_20190316_193046

In my opinion, a place like the Fab Lab is an enrichment for Siegen. I just don’t understand why so many people walk past it. 😮 Anyway, I’m looking forward to spending more time there.

Until then: Happy work!

A Raspberry Pi Case Rarely Comes Alone

A field report by Henning Schroeder

In mid-January 2019, during the course of a project with my Raspberry Pi (Wikipedia) 3B+, I was looking for a suitable case that would hold my PI with a 3.5-inch TFT screen. Since I’m new to Raspberry Pis, I thought that doing as much as possible myself would get me up to speed faster than click and buy products from various online markets. With this in mind, I searched for a company in Siegen that performs 3D printing. Right on the first Google run, I came across the Fab Lab website. After a quick phone call to the Fab Lab, I got the info to just come by the following Friday. So it happened that shortly after I entered the Fab Lab I was shown the entire Fab Lab, the staff and the equipment in an extremely friendly manner. The concept of the Fab Lab was previously only known to me from articles on the web. However, this still seemed a long way off for a city like Siegen. All the more I was surprised and thrilled. Everyone present made a very nice impression while focused but always helpful in the Fab Lab.

The 3D Model and Printing

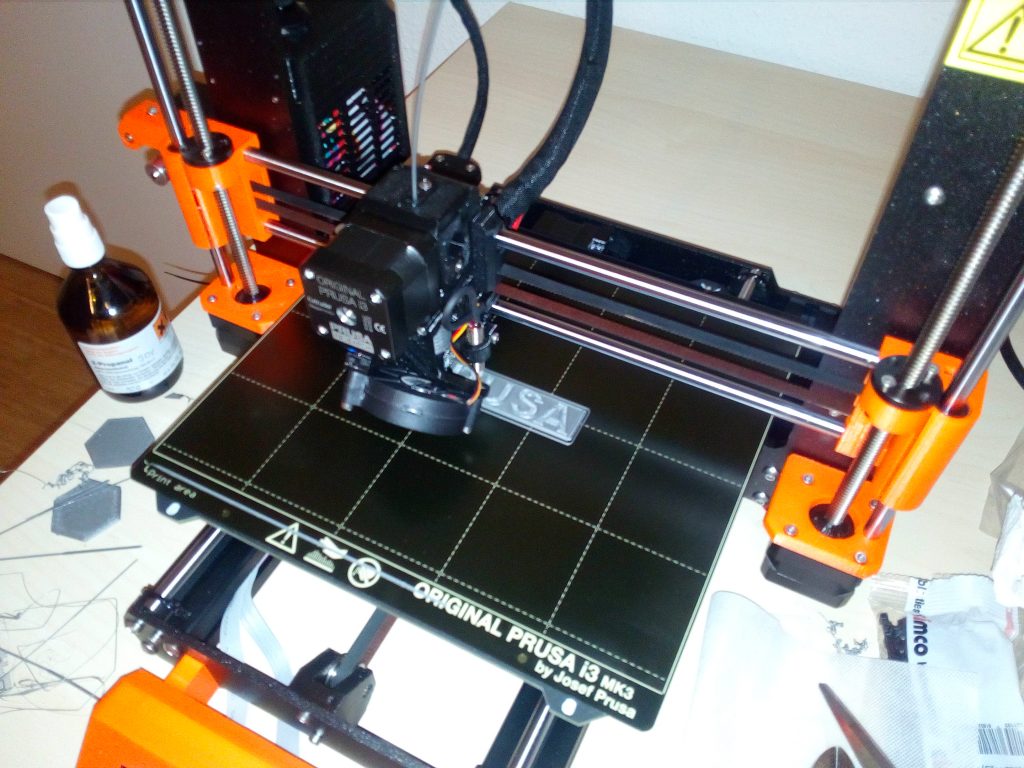
So, with the help of Fabian, I started using the Slice program (Wikipedia) to prepare the file I had previously downloaded via Thingiverse for the 3D printer, brand “Prusa“. After slicing, we exported the generated G-code (Wikipedia) to an SD card, again plugged it into the 3D printer, and started preparing it at the printer. This consisted of removing any previous printing residue from the printing plate with an alcohol solution and then briefly polishing it. After that, we started printing with a few keystrokes. According to the ad, this was supposed to last longer than the Fab Lab’s opening hours, whereupon Fabian made me the offer to put the print on a shelf after it was finished, from which I could pick it up at any time. After a few more Q&A situations that I needed to understand the complexity of the community/open source model in Fab Lab, I left.
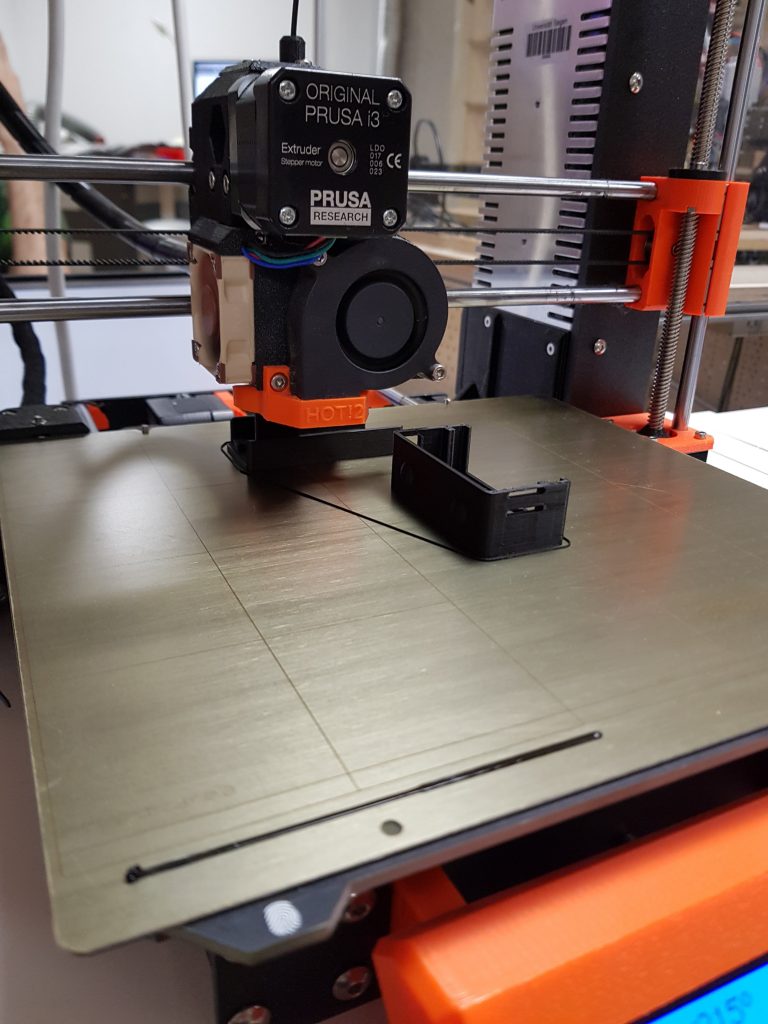
Print of the Raspberry-Pi housing

Mistakes Lead to New Ideas

Of course, only to return to the Fab Lab three days later in the evening, full of excitement.
I tried to insert the PI including the screen into the case directly after I had fetched the case from the aforementioned shelf. Unfortunately, the top layer of the screen cracked in the process. This can probably be attributed to the ambient temperature at that time, which is probably not very good for a screen at 0°C. Mistakes in a project and frustration lead to new ideas (at least for me).

A Project Rarely Comes Alone

So it came that I was looking for a new housing project. This I started slightly smaller and simpler than the screen case. Again on Thingiverse. Once again soaking up ideas. Using software called Blender (Wikipedia), I created a “thrifty” cage-look bumper case over many hours of gruesome desperation. The next Friday, for the next Open Lab, I sought out the Lab again to dive into 3D printing. After a little help from the Lab visitors and staff present, the bumper case printing began. This one also worked to complete satisfaction and fits spot on.

Now I am busy with my thoughts around the next project at Fab Lab Siegen.

3D Models to Copy and Develop

The 3D models for the Pi cases are also available for download:

Cytrill – Game Controller Made in Siegen

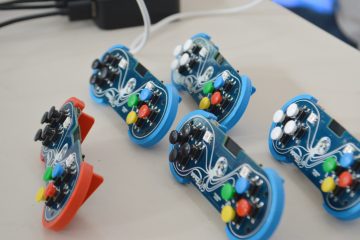
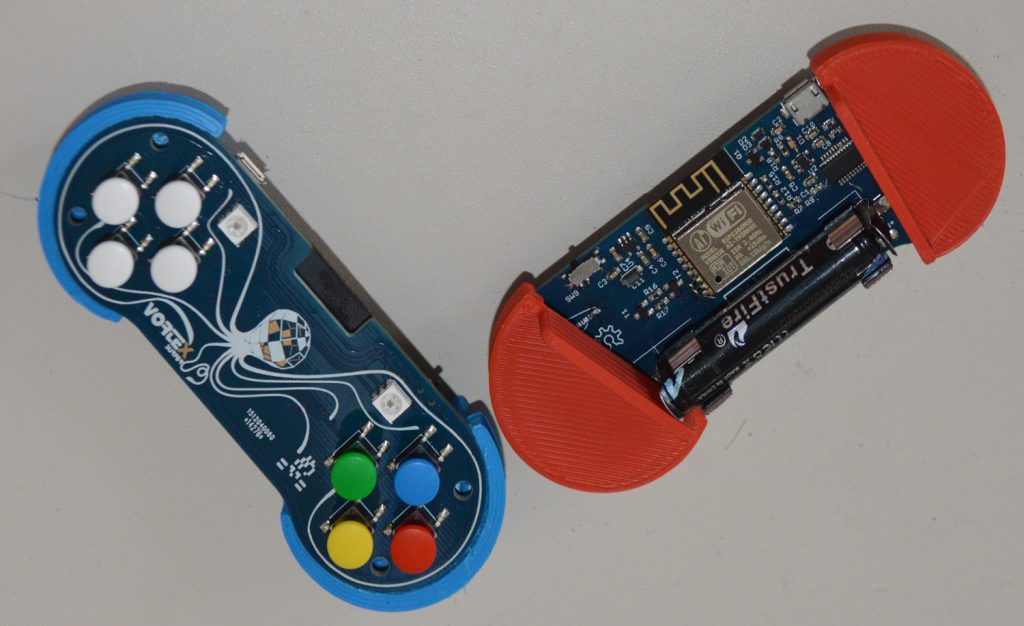
Hackspace Siegen has developed a single-board computer for gaming, education, and experimentation that allows over 32 people to play together on one screen at the same time – a collaborative project for which our Fab Lab, among others, was used. From hardware to games, everything at Cytrill is open source.

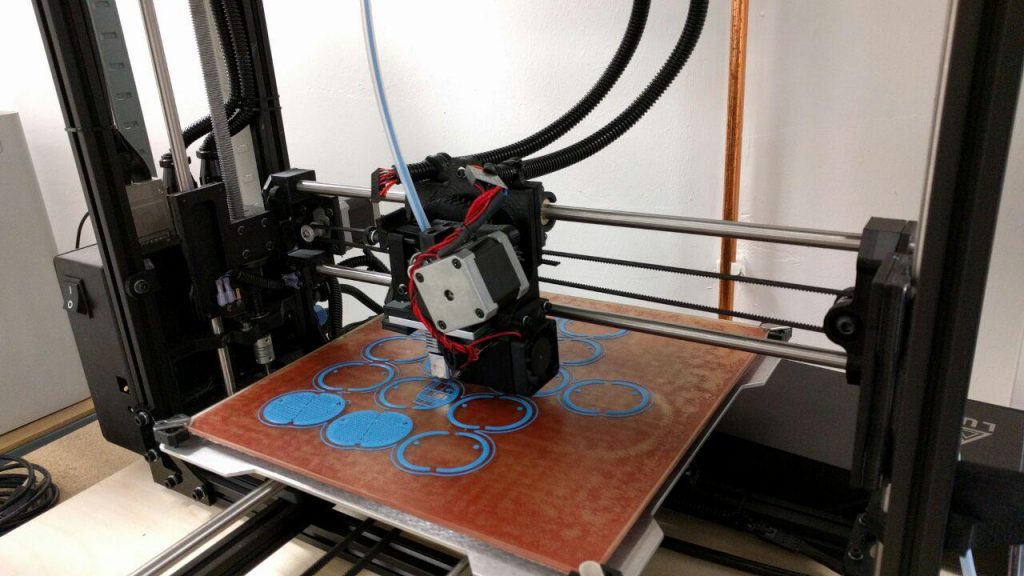
It took about a whole year until the members of HaSi could hold the first finished controller in their hands. The idea was there, but a lot of thought went into the implementation: what should the game controller look like in the end? Which design is best for the use? In the end, a small, colorful single-board computer was created, which is similar in appearance to well-known controllers. Apart from the many buttons, the minimalistic, differently colored grips, which are plugged into the sides of the board, are striking. These grips were printed from PLA with the Luzlbot in our Fab Lab.

In the future, however, a second variant will also be created, in which two transparent Plexiglas plates are used instead of the grip panels, so that the complete circuit board remains visible. This variant is to be produced as a prototype in our lab using laser cutting.

Meanwhile, there are already several games for the controller: “Wallhack” (similar to Achtung the Curve), “RaceCtrl” (a car race), “Crystal Mett” (a game in which you have to collect crystal pigs in teams) and “SpaceCtrl” (a spaceship game). All games were created in the open source game engine Godot and so there is a GD script that controls the LEDs on the controllers that show the status or the current game color. The board itself is based on an ESP8266 radio module and has four small joysticks on each side. The controllers have a USB interface, but this is only used for loading and programming. Wifi is used to connect to games and applications, and power is supplied via a battery. The plates are decorated with an octopus and gold details.

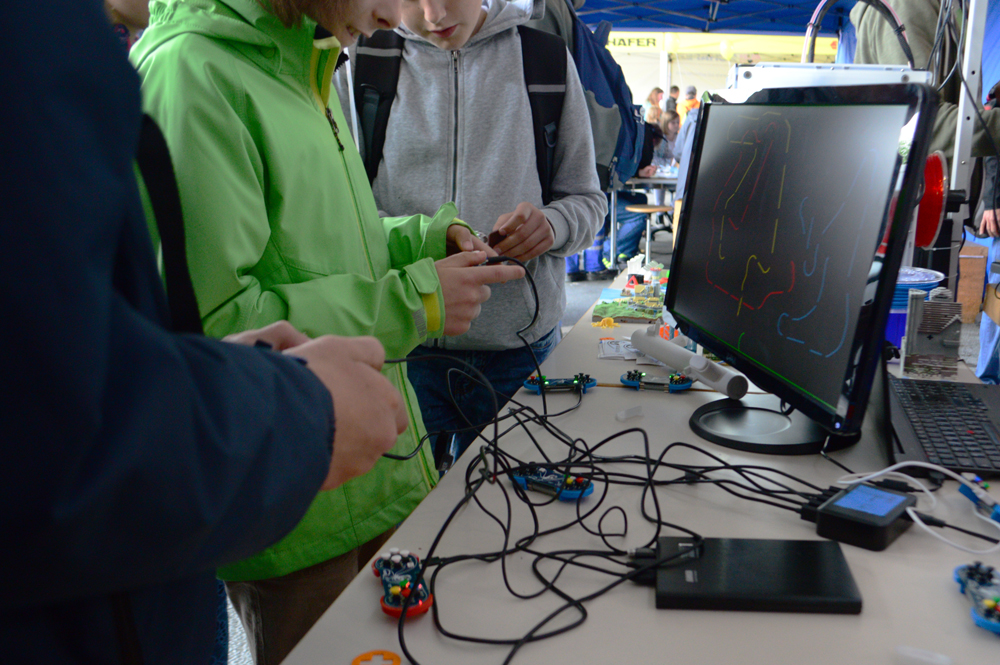
Cytrill and individual games could already be tested in public, for example (as seen above) on the Day of Technology or the Siegen Art and Culture Week Art!Si, and gave pleasure to both young and old. The small colorful controllers attracted attention and as soon as they were tried out, some could hardly detach themselves from them. People who didn’t know each other before played against and with each other with visibly a lot of fun, much to the delight of the developers.

In the future, Cytrill will be used in workshops at our Fab Lab, but also for university teaching. The invention shows that the hacker and maker culture has already arrived in Siegerland and that it enables jointly developed, innovative projects.

Cytrill on detail:

Aya – a Selfmade 3D Printer

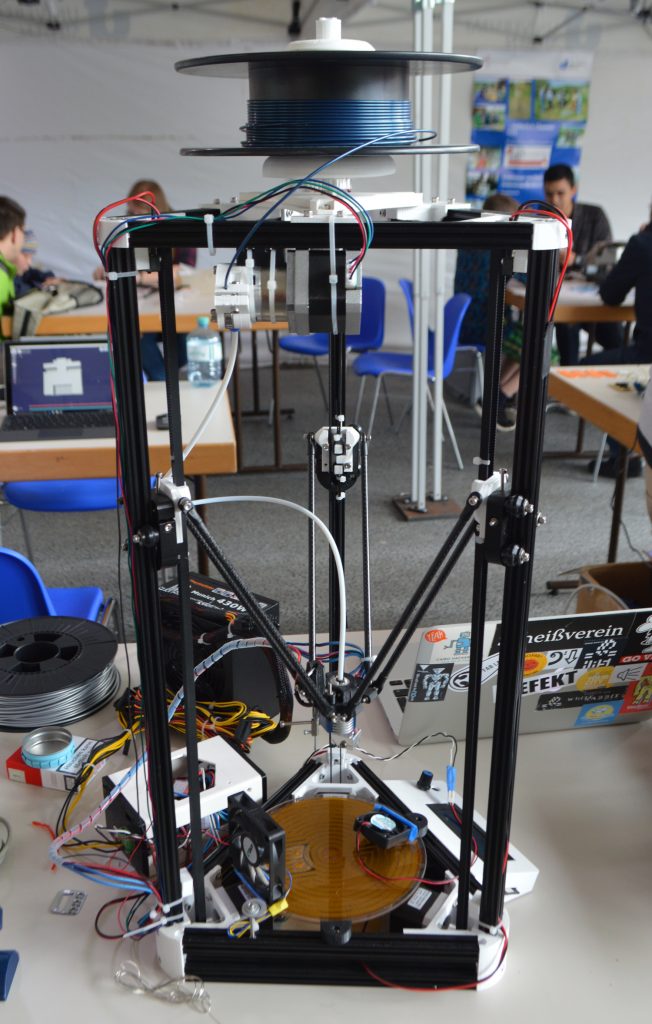
Aya – that’s a 3D printer that students of the Human-Computer Interaction master’s program produced in the winter semester 2015/2016 as part of the “3D Printing” seminar.

At the beginning of the seminar, the students were first familiarized with the basics of digital fabrication: What manufacturing processes are there, what materials can be used for printing, what are the possible application potentials? They also learned more about the individual steps of 3D printing: from modeling, to slicing (the “translation” of a 3D model into instructions for the printer), to the printing itself. For the subsequent project work, four students decided to devote themselves to building their own 3D printer.

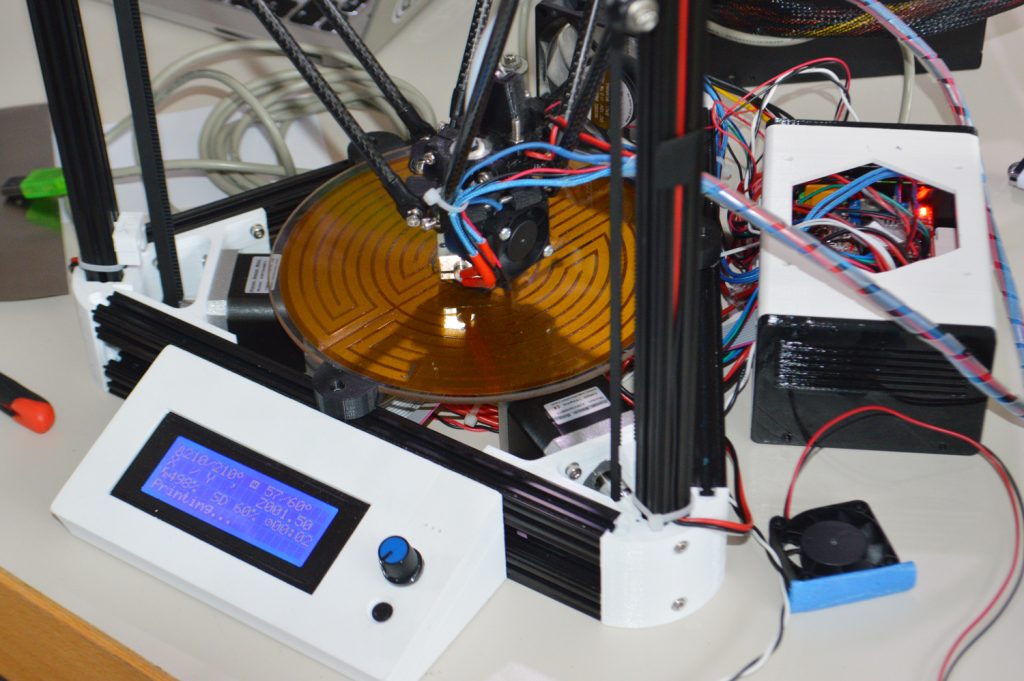
The project participants used a kit as a basis, which already contained most of the parts needed for construction. All blueprints as well as the control software are available open source and so the students first built the printer according to the distributor’s template. However, they quickly discovered that not everything was working properly. So they decided to print some housing parts themselves using a different 3D printer in the Fab Lab and made other changes to improve print quality, such as adjusting the holder for the consumable. This was followed by a longer calibration phase, because the automatic support systems, which the printer actually has for this, unfortunately didn’t work quite as well as expected.

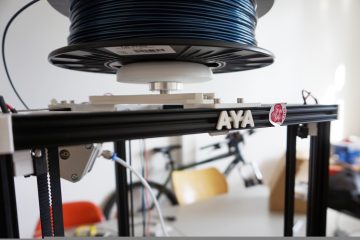
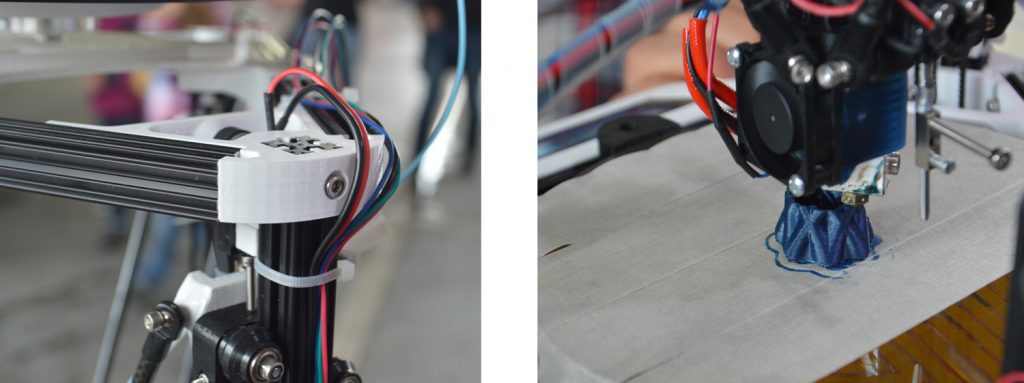
The students spent an entire semester working on the printer, which they named Aya (after a Japanese movie character). Aya is a Delta Robot 3D printer whose distinctive feature is its design: The three-axis system, which differs from conventional printers with linear axis systems, enables fast, precise printing. In addition to smaller test prints, the first larger prints such as an owl or a vase have already been made. Initial test runs indicate that Aya can print at a fabulous speed of up to 300-350 mm/second.

Even though the study project has now been completed, the students want to continue working on optimizing the 3D printer. For example, the installation of the control electronics or the stabilization of the base frame is being considered here to make Aya more transportable. There are also plans to test Aya with other materials such as ABS – the plastic used to make Lego bricks, for example – because so far only PLA, an environmentally friendly plastic based on (corn) starch, has been used as a material.

The students themselves learned a lot about 3D printing during the seminar and by building Aya. On Technology Day, the printer was presented and used for the first time in front of a broad public.

Aya in full size:

Zeit.Raum – Making Siegen come alive

The interdisciplinary research project ZEIT.RAUM Siegen is being carried out in close cooperation with citizens and aims to make the city of Siegen experience and understand its space and history in a collaborative way using innovative technology. ZEIT.RAUM is designed to facilitate collaboration and exchange between all interested parties – from academics and students to schoolchildren and amateur historians – about the city’s history, present and future. This opens up new forms of knowledge generation and transfer.

The project consists of two interlinked components: A touchable table-sized city model for interaction, produced using various digital fabrication processes and exhibited in the Siegerland Museum. Built-in sensors enable an interactive experience of the city and its history, which also stimulates individual memories. The second central element of the project is the Stadtwiki, a collaborative digital platform on Siegen’s city history, which is being developed by and for citizens. In addition to collecting information, it also serves as a forum to discuss the meaning of the data collected. Places of remembrance are identified, processed and reflected upon. All components of the project should be designed in such a way that they are easily accessible, understandable and easy to use for all interested parties.

One of the first test prints for the interactive city model
The role of the Fab Lab

We at Fab Lab are also involved in the project on several levels, especially in the creation of the interactive city model. The existing virtual 3D model of the city of Siegen, which was created by Prof. Jarosch, serves as the data basis for this. The topography is milled out of a large plate in the Lab. Which material is best suited for this is currently being tested. The true-to-the-original buildings of the city installed on it, on the other hand, are printed with the 3D printers in the Fab Lab. The sensor technology that will later be installed in the city model, which should be as user-friendly as possible, is also being developed in our lab. Several students are also involved in the project, working on individual components of the project within the framework of qualification theses.

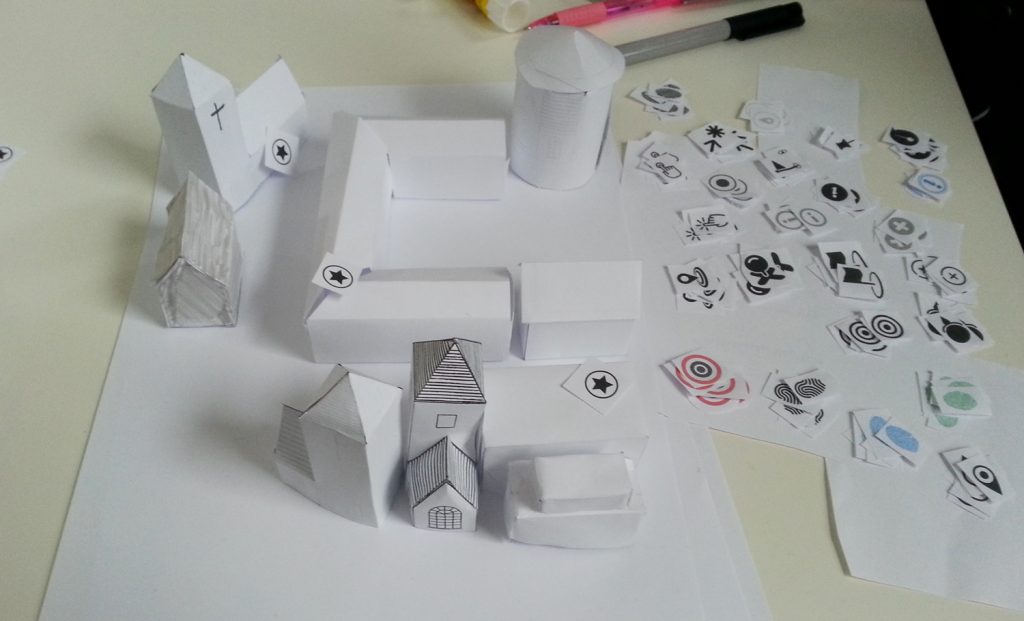
Paper prototype for the interaction concept of the city model
Current developments

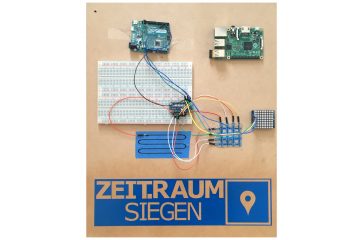
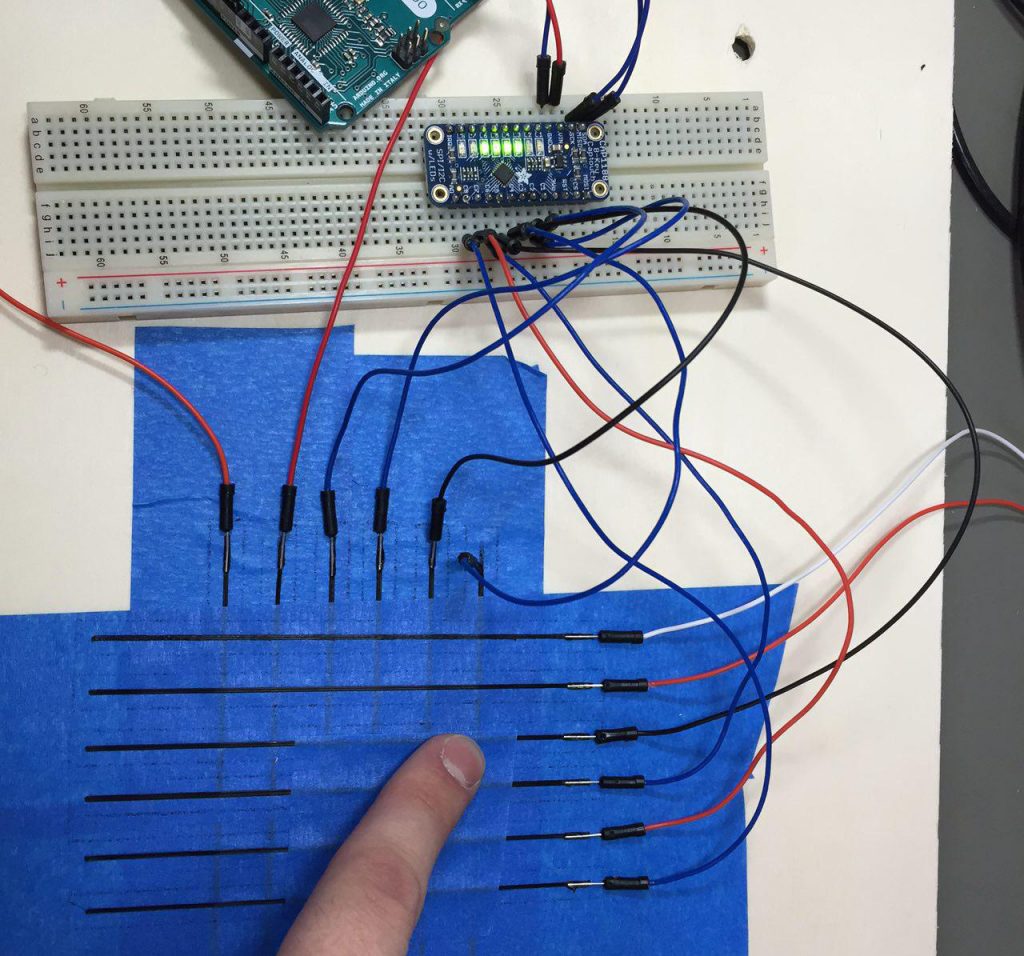
Currently, students are working on the design of the interaction concept and have, among other things, created a paper prototype of the city model. Likewise, the first prototypes for the city model have already been successfully printed and the sensor technology extensively tested. The model is printed with conductive filament so that the sensors can later be built directly into the city model. As part of this initial technical work, a developer board (see cover picture) was also created on which the following were installed: Arduino-Leonardo, Raspberry Pi 2, CAP1188-Breakout, 3D-printed touch sensor and 3D-printed matrix.

Test of the sensor technology to be installed in the city model

During one of our last project meetings, a first model of the Nikolaikirche – probably the best known landmark of the city of Siegen – was already printed. It took our Ultimaker a whole three hours to make the 1:9000 scale model.
Here you can see the result:

.

Other project partners

In addition to the Fab Lab, the University of Siegen also involves the Chair of Didactics of History headed by Prof. Dr. Bärbel Kuhn, the Chair of Practical Geodesy and Geoinformation headed by Prof. Dr. Monika Jarosch and the Chair of Computer Supported Group Work headed by Prof. Dr. Volkmar Pipek. The realisation was made possible by the support of the university and the Friends and Patrons of the Siegerlandmuseum, who see the project as an investment in the future of the Siegerlandmuseum. The Siegerland Museum is to be strengthened by ZEIT.RAUM in its role for cooperative and inclusive historical work in and with the region.

We will of course keep you informed about further developments of the project in and around the Lab.